Customize Your Kicks: 5 Essential Tools for Sneaker Beginners
Customizing sneakers is an exciting way for beginners to express individuality, and this article outlines five essential tools and techniques to get started, ensuring each pair becomes a unique work of art.
Embarking on the journey of customizing sneakers can feel daunting, but with the right tools and techniques, anyone can transform ordinary footwear into personalized masterpieces. Let’s explore five essentials that will set you up for success!
Getting Started: Understanding Sneaker Customization
Sneaker customization is more than just a hobby; it’s a form of self-expression and a way to stand out from the crowd. Whether you’re looking to add a personal touch to your favorite pair or completely revamp them, knowing the basics is crucial.
This section will cover the foundation of sneaker customization, helping you understand the possibilities and the commitment involved. It’s about making each sneaker your canvas!
Why Customize Sneakers?
Customizing sneakers allows for unprecedented personalization. It’s about creating something that reflects your unique style and personality.Here’s why people customize:
- Uniqueness: Stand out with a one-of-a-kind design.
- Expression: Showcase your personality and interests.
- Revitalization: Breathe new life into old sneakers.
Consider the type of sneakers you want to customize. White leather sneakers are a popular choice due to their versatility, but canvas and synthetic materials also work well. Different sneakers can handle different types of paints and treatments so be aware of what works best for the pair you choose.
The possibilities are truly endless when it comes to sneaker customization, with the right mindset, preparation and guidance you will be off to customizing sneakers like a pro in no time.
Unveiling The 5 Essential Tools For Sneaker Customization
Having the right tools can make all the difference in your sneaker customization journey. Think of them as your brushes, chisels, and sewing machines. In this section, we’ll go over each tool and why it is a necessity.
Equipping yourself with these essential tools not only ensures better results but also makes the entire process more enjoyable and efficient – so lets dive into those essentials.
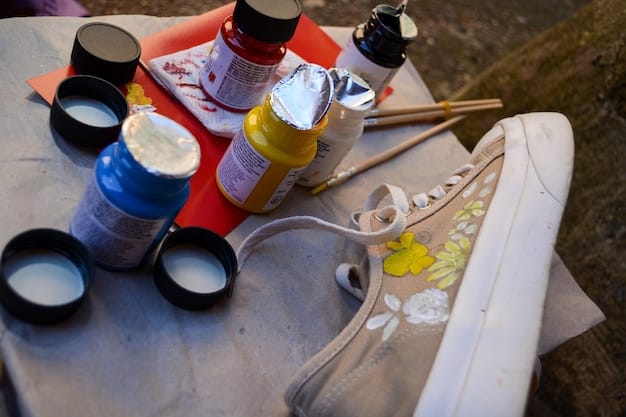
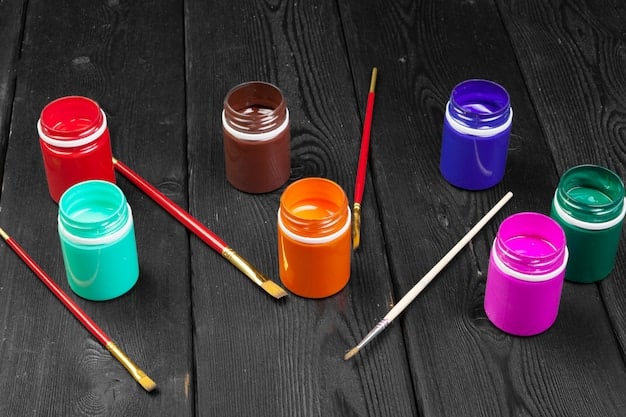
1. Quality Acrylic Paints
Acrylic paints are the cornerstone of sneaker customization. They offer vibrant colors, durability, and excellent adhesion to various materials. Here’s why they’re essential:
- Versatility: Suitable for leather, canvas, and synthetic sneakers.
- Durability: Resistant to cracking and fading with proper sealing.
- Mixability: Allows you to create custom colors and shades.
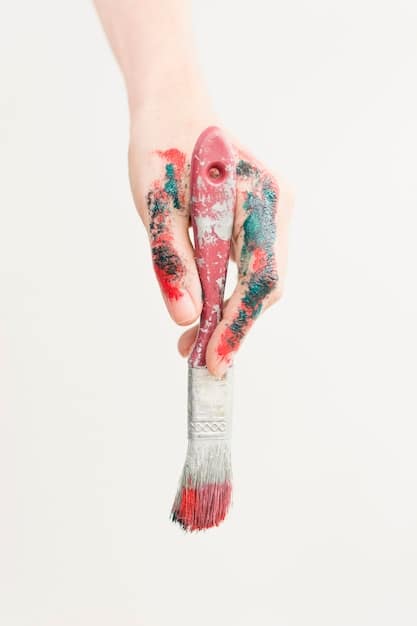
2. Assorted Paint Brushes
Different brush sizes and shapes are crucial for achieving various effects and details in your designs. Investing in a variety of brushes will significantly enhance your customization capabilities:
- Fine Detail Brushes: For intricate lines and small details.
- Flat Brushes: For filling in large areas and creating smooth gradients.
- Round Brushes: For outlining and creating curved shapes.
3. Painter’s Tape
Painter’s tape is an invaluable tool for creating clean lines and protecting areas you don’t want to paint. Applying painter’s tape correctly is essential for achieving professional results.:
- Precision: Ensures sharp, clean edges.
- Protection: Prevents accidental paint spills on unwanted areas.
- Versatility: Can be used to create geometric patterns and designs.
With painter’s tape, you can create stencils, geometric patterns, and protect areas from overpainting, ensuring sharp, clean lines that elevate your designs.
4. Fabric Markers
Fabric markers really up the level of potential customization by allowing you to draw, write and highlight certain areas in ways that brushes and paint can’t. Here is why you should invest in fabric markers:
- Precision: Allows for the outlining of intricate lines and fine details on your sneakers.
- Versatility: Suitable for fabrics such as canvas, cotton and other synthetic materials.
- Mixability: Can be paired with acrylic paints for a vibrant duo that will ensure the best possible results in your sneaker customization.
Fabric markers can open all new possibilities and levels of customization allowing for unique and beautiful sneaker designs.
5. Sealer
Once your design is complete, sealing it is crucial to protect it from wear and tear. Acrylic finishers and sealers are essential for preserving your artwork and ensuring its longevity. Here’s why:
- Protection: Forms a protective layer against scratches, water, and UV damage.
- Flexibility: Maintains the flexibility of the sneaker material to prevent cracking.
- Finish: Provides either a matte or glossy finish to enhance the appearance.
Sealing your work is a vital habit, it is an essential part of any sneaker customization to make sure that your work is safe from the elements. Ensure that you have sealer to allow your work to have longevity.
Mastering Essential Techniques for Sneaker Customization
Beyond the right tools, mastering fundamental techniques will elevate your sneaker customization skills. This section covers some of the most important techniques for beginners.
From blending colors to creating intricate designs, these techniques will help make your creations truly stand out and give all of the viewers jaw dropping results.
Color Blending
Color blending involves smoothly transitioning one color into another to create gradients or unique shades. Techniques include:
- Wet-on-Wet Blending: Applying new colors while the previous layer is still wet.
- Dry Brushing: Using a dry brush to lightly blend colors at the edges.
- Layering: Applying thin layers of different colors to achieve a blended effect.
Stenciling
Stenciling is a great way to create precise designs and patterns on your sneakers.You can create your own simple designs, or even go wild and purchase professional grade stencils. Here are a few tips for stenciling
- Adhesive Stencils: Use adhesive-backed stencils that allows you to easily place them and hold them in place
- Multi Layer Stencils: Opt for multi layered stencils that will allow you to create more complex and intricate designs
- Custom Shaped Stencils: Stencils can be shaped into any shape, giving you free reign to make all the creations you desire.
Using stencils will help you make sure each and every line and corner is precise, this allows for cleaner lines and allows you to take your skills to a level unseen.
Creating A Design
Before you even touch your sneakers with paint, plan meticulously. Sketch your ideas on paper or use digital tools to visualize the final product. Consider color schemes, patterns, and themes that resonate with your personal style. Next, gather inspiration from various sources such as fashion trends, artwork, nature, or even other customized sneakers.
- Drafting: Test out and explore each possibility before you even begin.
- Practice: Try your hand at a smaller prototype before painting your sneaker.
- Vision: Have a vision in mind before you begin.
Creating a proper design will help guide you and help you get the final product just right allowing you to customize your sneakers without the issue of potentially ruining your sneakers.
Prepping Your Sneakers For Customization: A Step-by-Step Guide
Proper preparation is key to achieving a professional finish when customizing sneakers. This section will guide you through the essential steps to prep your sneakers before you start painting.
Before painting always ensure that your sneakers are properly prepped or you face the possibly of the paint not adhering correctly – so lets see what the crucial steps are to keep in mind.
Cleaning Your Sneakers
Begin by thoroughly cleaning your sneakers to remove any dirt, dust, or grime. Use a sneaker cleaner or mild soap and water, along with a soft brush, to scrub the surface. Rinse well and allow the sneakers to dry completely.
- Loosen Laces: This step will allow you to properly get to every area of the sneaker.
- Scrub: Scrub every last stain spot or dust to prepare the surface.
- Dry: Let the sneakers dry so there are no impurities.
By properly cleaning your sneakers your paint will have the best chance to survive the elements and will allow you to create some works of art on your new canvas.
Masking Areas
Use painter’s tape to mask off any areas you don’t want to paint, such as the soles, logos, or trim. Apply the tape carefully, ensuring it adheres smoothly to the surface. For curved areas, use small strips of tape to follow the contours.
- Small Strips: Use small strips when masking for tight or hard to reach areas.
- Adhere Smoothly: Smooth the tape to ensure there are no bumps or pockets.
- Quality Tape: Opt for painter’s tape for quality.
Masking will not only help you keep your lines clean but will also help you protect your sneakers from making unwanted mistakes that will impede your overall experience.
Sanding the Surface
For leather or synthetic sneakers, lightly sanding the surface can improve paint adhesion. Use fine-grit sandpaper to gently roughen the material. Be careful not to sand too aggressively, as this can damage the surface. Wipe away any sanding dust with a clean cloth before proceeding.
- Fine Sand Paper: Using the appropriate sanding paper will prove beneficial.
- Clean Cloth: Giving the sneakers a final wipe is essential to preparing the perfect foundation.
- Not Too Aggressively: Avoiding sanding to hard will ensure that you don’t end up damaging your canvas, your sneakers.
By following these steps, your sneakers will be properly prepped for customization ensuring a smooth and professional finish.
Troubleshooting Common Sneaker Customization Issues
Even with the right tools and techniques, you may encounter some common issues during sneaker customization. This section outlines potential problems and their solutions.
This section will help you overcome these challenges and achieve the results you desire, so that you can have a smooth and seamless experience.
Paint Cracking
Paint cracking can occur if the paint is applied too thickly or if the sneaker material is not flexible enough. To prevent this:
- Apply Thin Layers: Multiple thin layers are better than one thick layer.
- Use a Flexible Sealer: Ensure your sealer is designed for flexible materials.
- Properly Prep: Sanding will ensure flexibility and the ability to withstand constant walking and movement.
Uneven coverage
Uneven coverage of painting can be frustrating but can be fixed by knowing proper practice; Here are methods to preventing that:
- Use Appropriate Brushes: Ensure that you use the right size and shape for the job.
- Take Your Time: Taking time to carefully consider each and every stroke is an important step in the process.
- Multiple Coats: Giving your sneakers multiple coats will ensure the most seamless and complete finish and allow for the best possible end result.
By carefully considering each and every aspect, you will be able to properly customize sneakers without issue.
Color Bleeding
Color bleeding happens when using vibrant and strong colors. This results in the unwanted colors blending together. Here are a few ways to prevent it:
- Appropriate Masking: Ensuring that you have tape and other instruments will stop the bleeding.
- Proper drying: Be patient and let the paint completely dry so that you can avoid unwanted complications.
- Avoid Thicks Coats: Using the right amount of paint is essential to preventing bleeding.
Knowing the risks associated with customizing sneakers will help you have a safe and fun experience, so it is imperative that you are aware.
| Key Aspect | Brief Description |
|---|---|
| 🎨 Quality Paints | Use versatile and durable acrylic paints for vibrant, long-lasting designs. |
| 🖌️ Assorted Brushes | Employ diverse brush sizes for detailed linework and broad area coverage. |
| 🛡️ Protection | Mask unwanted areas and prep the sneakers by cleaning them and sanding them for the best final product. |
| 🧪 Seal | Apply sealer and finish to protect your final product from wear and tear and the elements. |
Flexible acrylic paint is the best choice for customizing sneakers as it adheres well to leather, canvas, and synthetic materials. Ensure it’s designed for fabrics to prevent cracking. Protect your design by applying several layers of a flexible acrylic sealer. This will shield against scratches, water, and UV damage, prolonging the life of your artwork. Yes, prepping your sneakers is crucial. Start by cleaning to remove dirt, then mask off areas you don’t want painted. Lightly sand the surface to improve paint adhesion. To prevent cracking, apply thin layers of paint and ensure the sealer is flexible. If cracking occurs, carefully touch up the area and re-seal the surface. Yes, fabric markers are great for adding fine details and outlines to your sneaker designs. Ensure they are permanent and waterproof for the best results that stand the test of time. By equipping yourself with the right tools, mastering a couple handy techniques, and being careful to prep and avoid potential mistakes you will be ready to get started on your sneaker customization journey. Happy customizing!
▼
▼
▼
▼
▼Conclusion


